


Making a new WordPress package available to your hosting customers, via Softaculous, is a simple process that only involves a few steps and a few minutes.
The first thing you’ll want to do is download the package here. For the purposes of this post, we’re going to use the restaurant package as an example.
When you unzip the package, you’ll get a folder called “wprestaurant”. Just move that whole folder right into the Softaculous “scripts” directory, which is where you should already have the default WordPress installation, as well as any other custom WordPress packages or installations you offer.
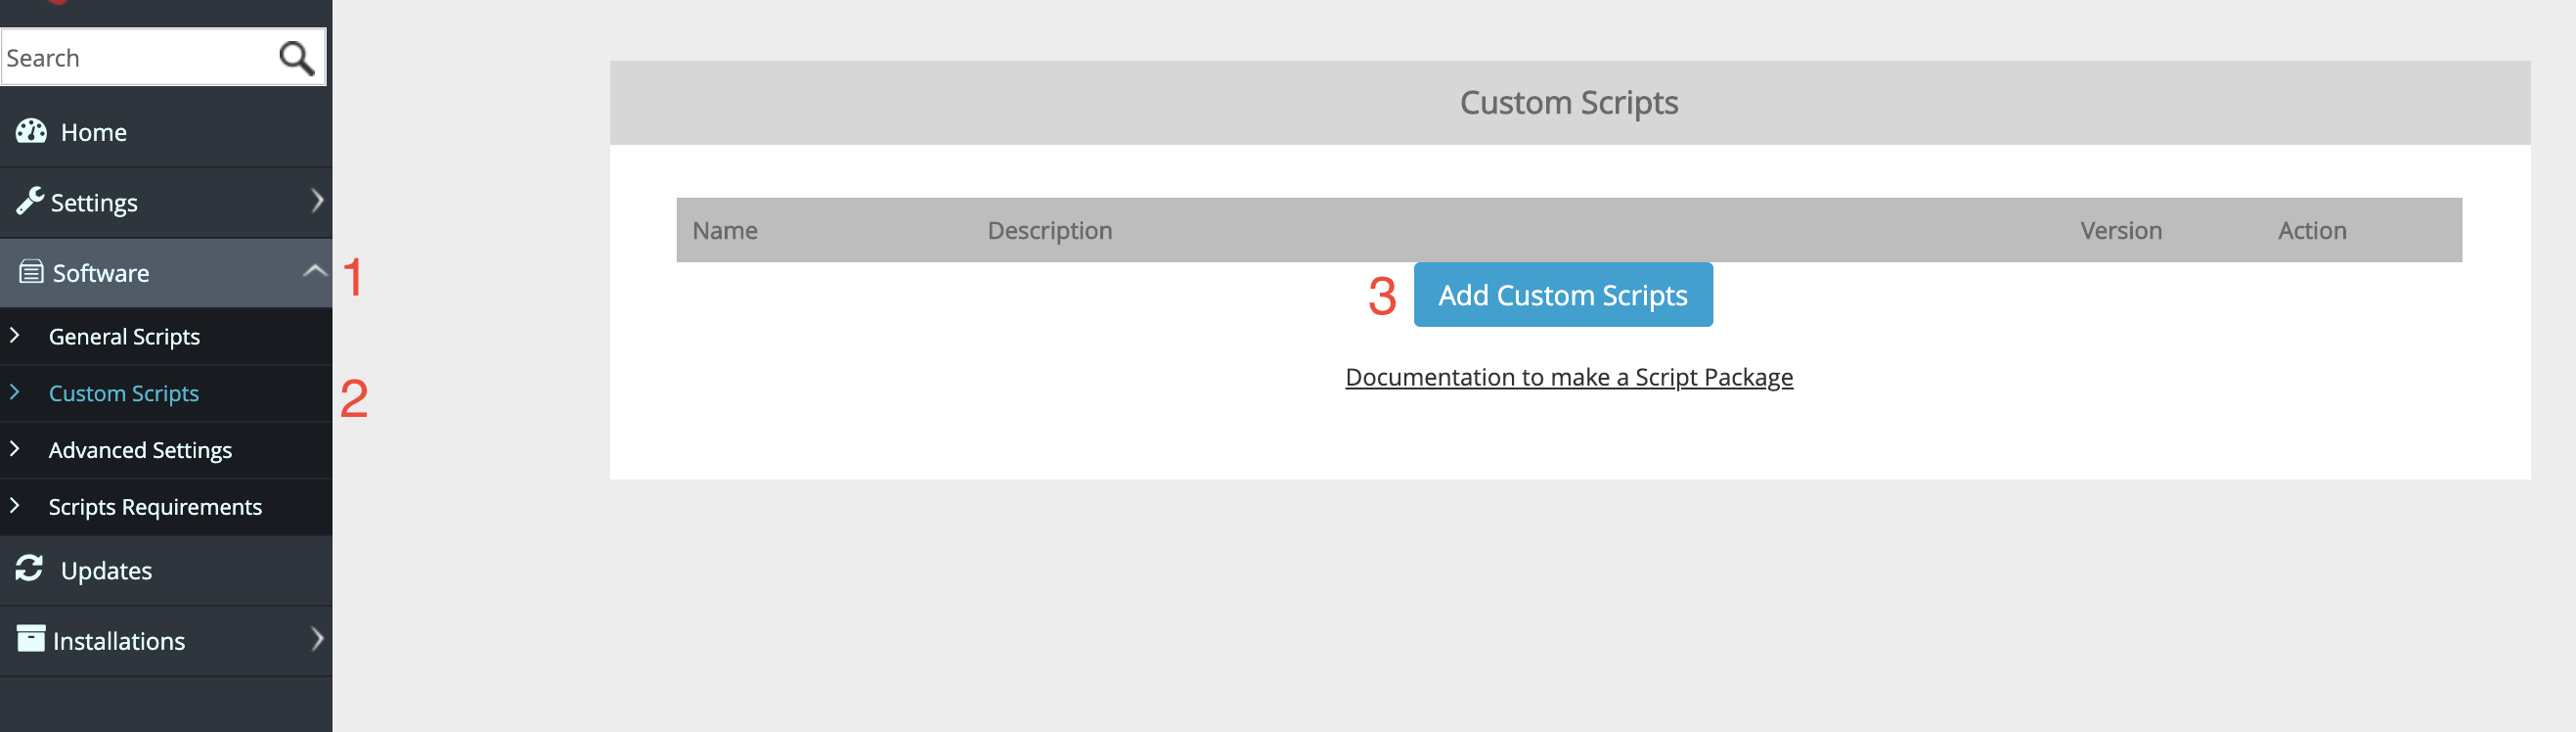
After putting the “wprestaurant” folder in the right location, open up the Softaculous admin interface. Go to the “Software” area (1) and click on “Custom Scripts” (2). On that page, click the “Add Custom Scripts” button (3). See the following screenshot with the numbered steps just referenced:
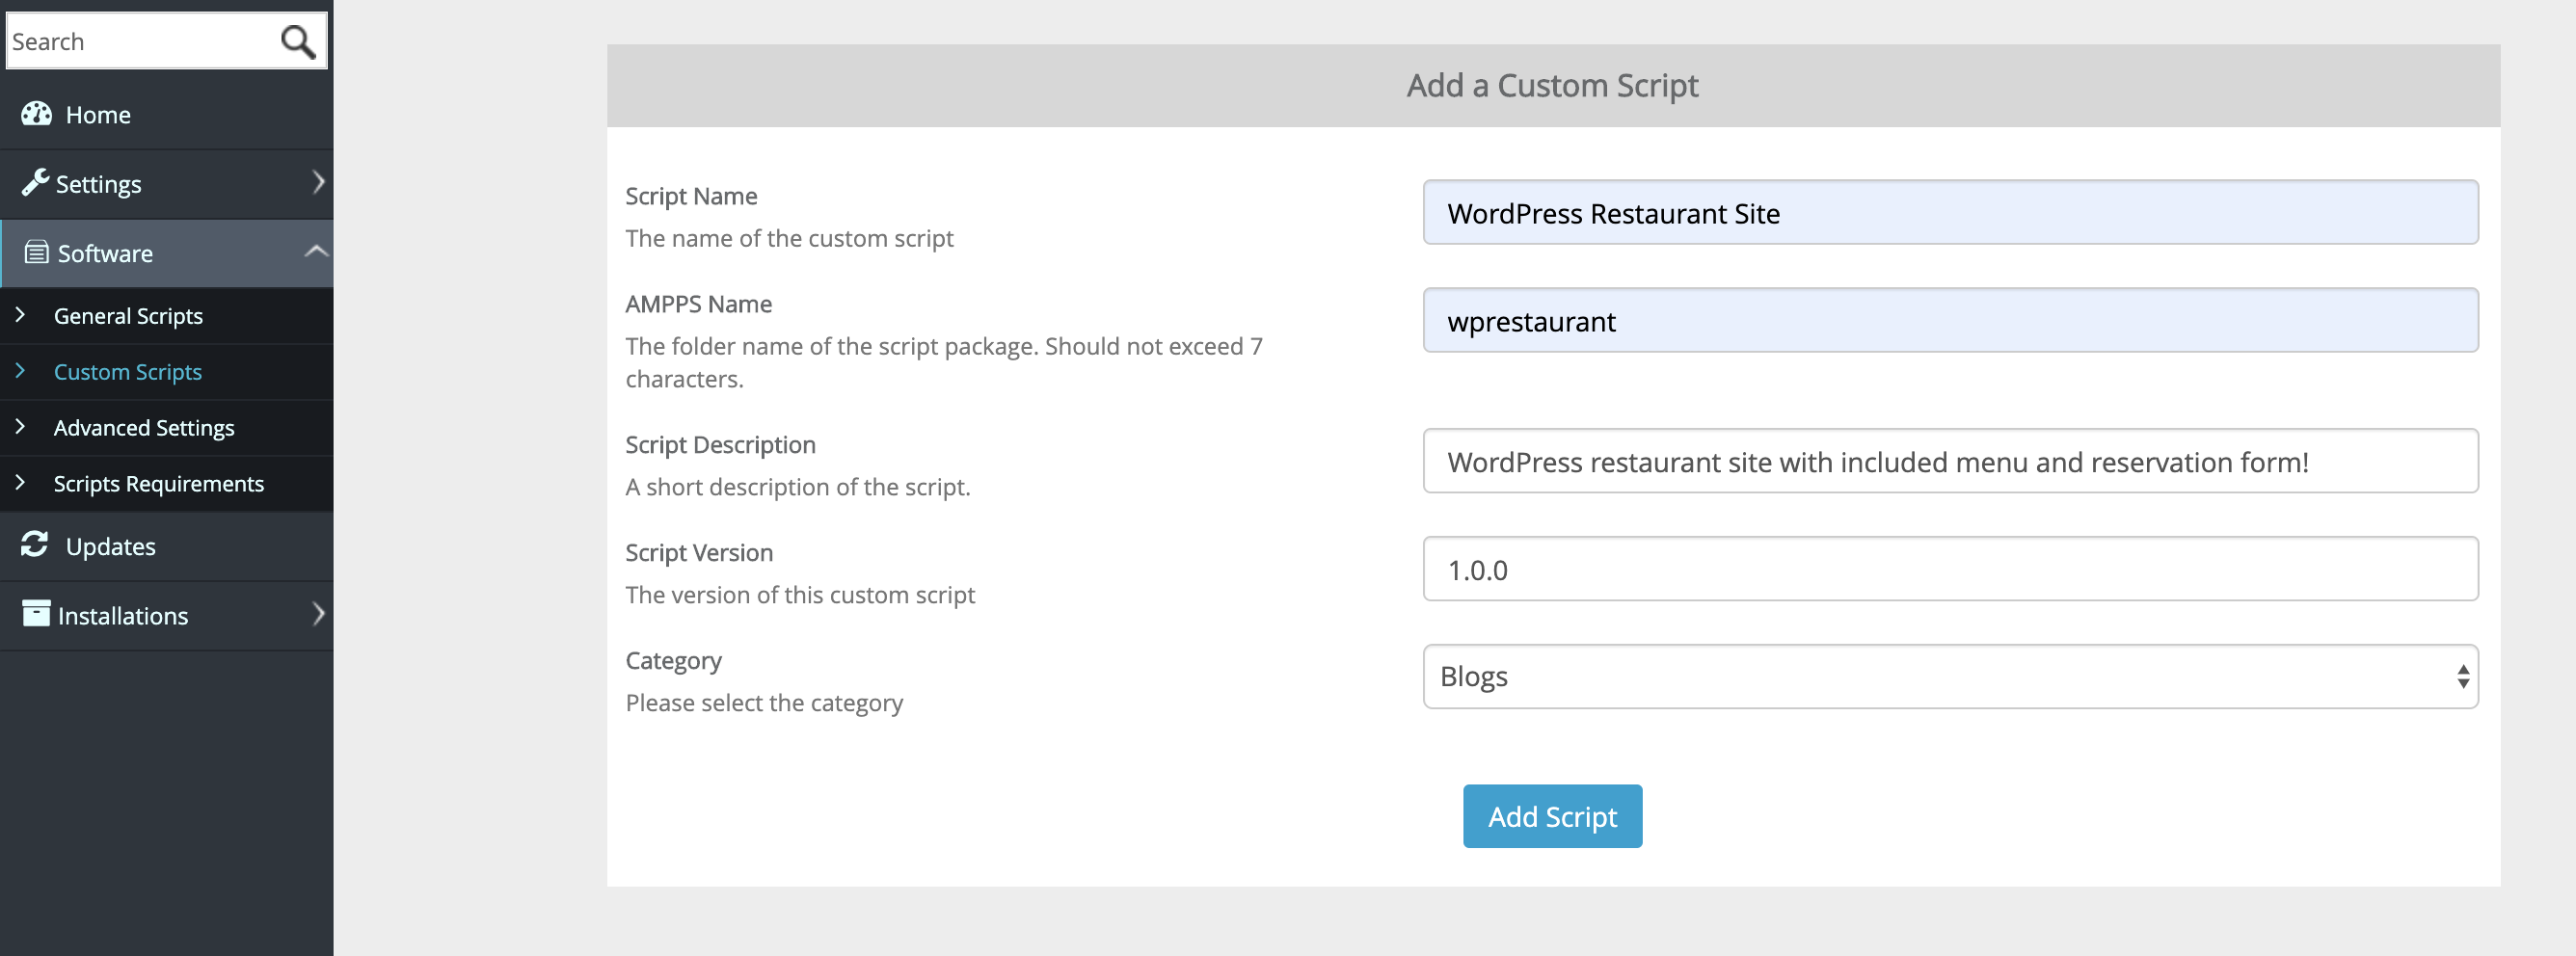
Now, on the “Add a Custom Script” page, you can fill in the required information for your new package. There, you’ll see the following fields:
- Script Name: Type in the name you want to give to the package. This is the name your customers will see.
- AMPPS Name: Write the name of the package folder. This is the same as the folder name we reference above. So, in the case of the restaurant package, it would be “wprestaurant”.
- Script Description: Write a short description of the package. Your customers will see this description when choosing a package.
- Script Version: Choose your initial version number for this package. If you want to stick to the numbering we use, start with 1.0.0.
- Category: Choose the category you want this to show in for your customers. In most cases, you’ll likely want to put it in the same category as your regular WordPress package, so it’s easy to find for your customers. In most cases, this is the “Blog” category.
Please see the following screenshot for a visual of the “Add a Custom Script” page, with the above fields filled in.
Once you have all those fields filled in, click the “Add Script” button.
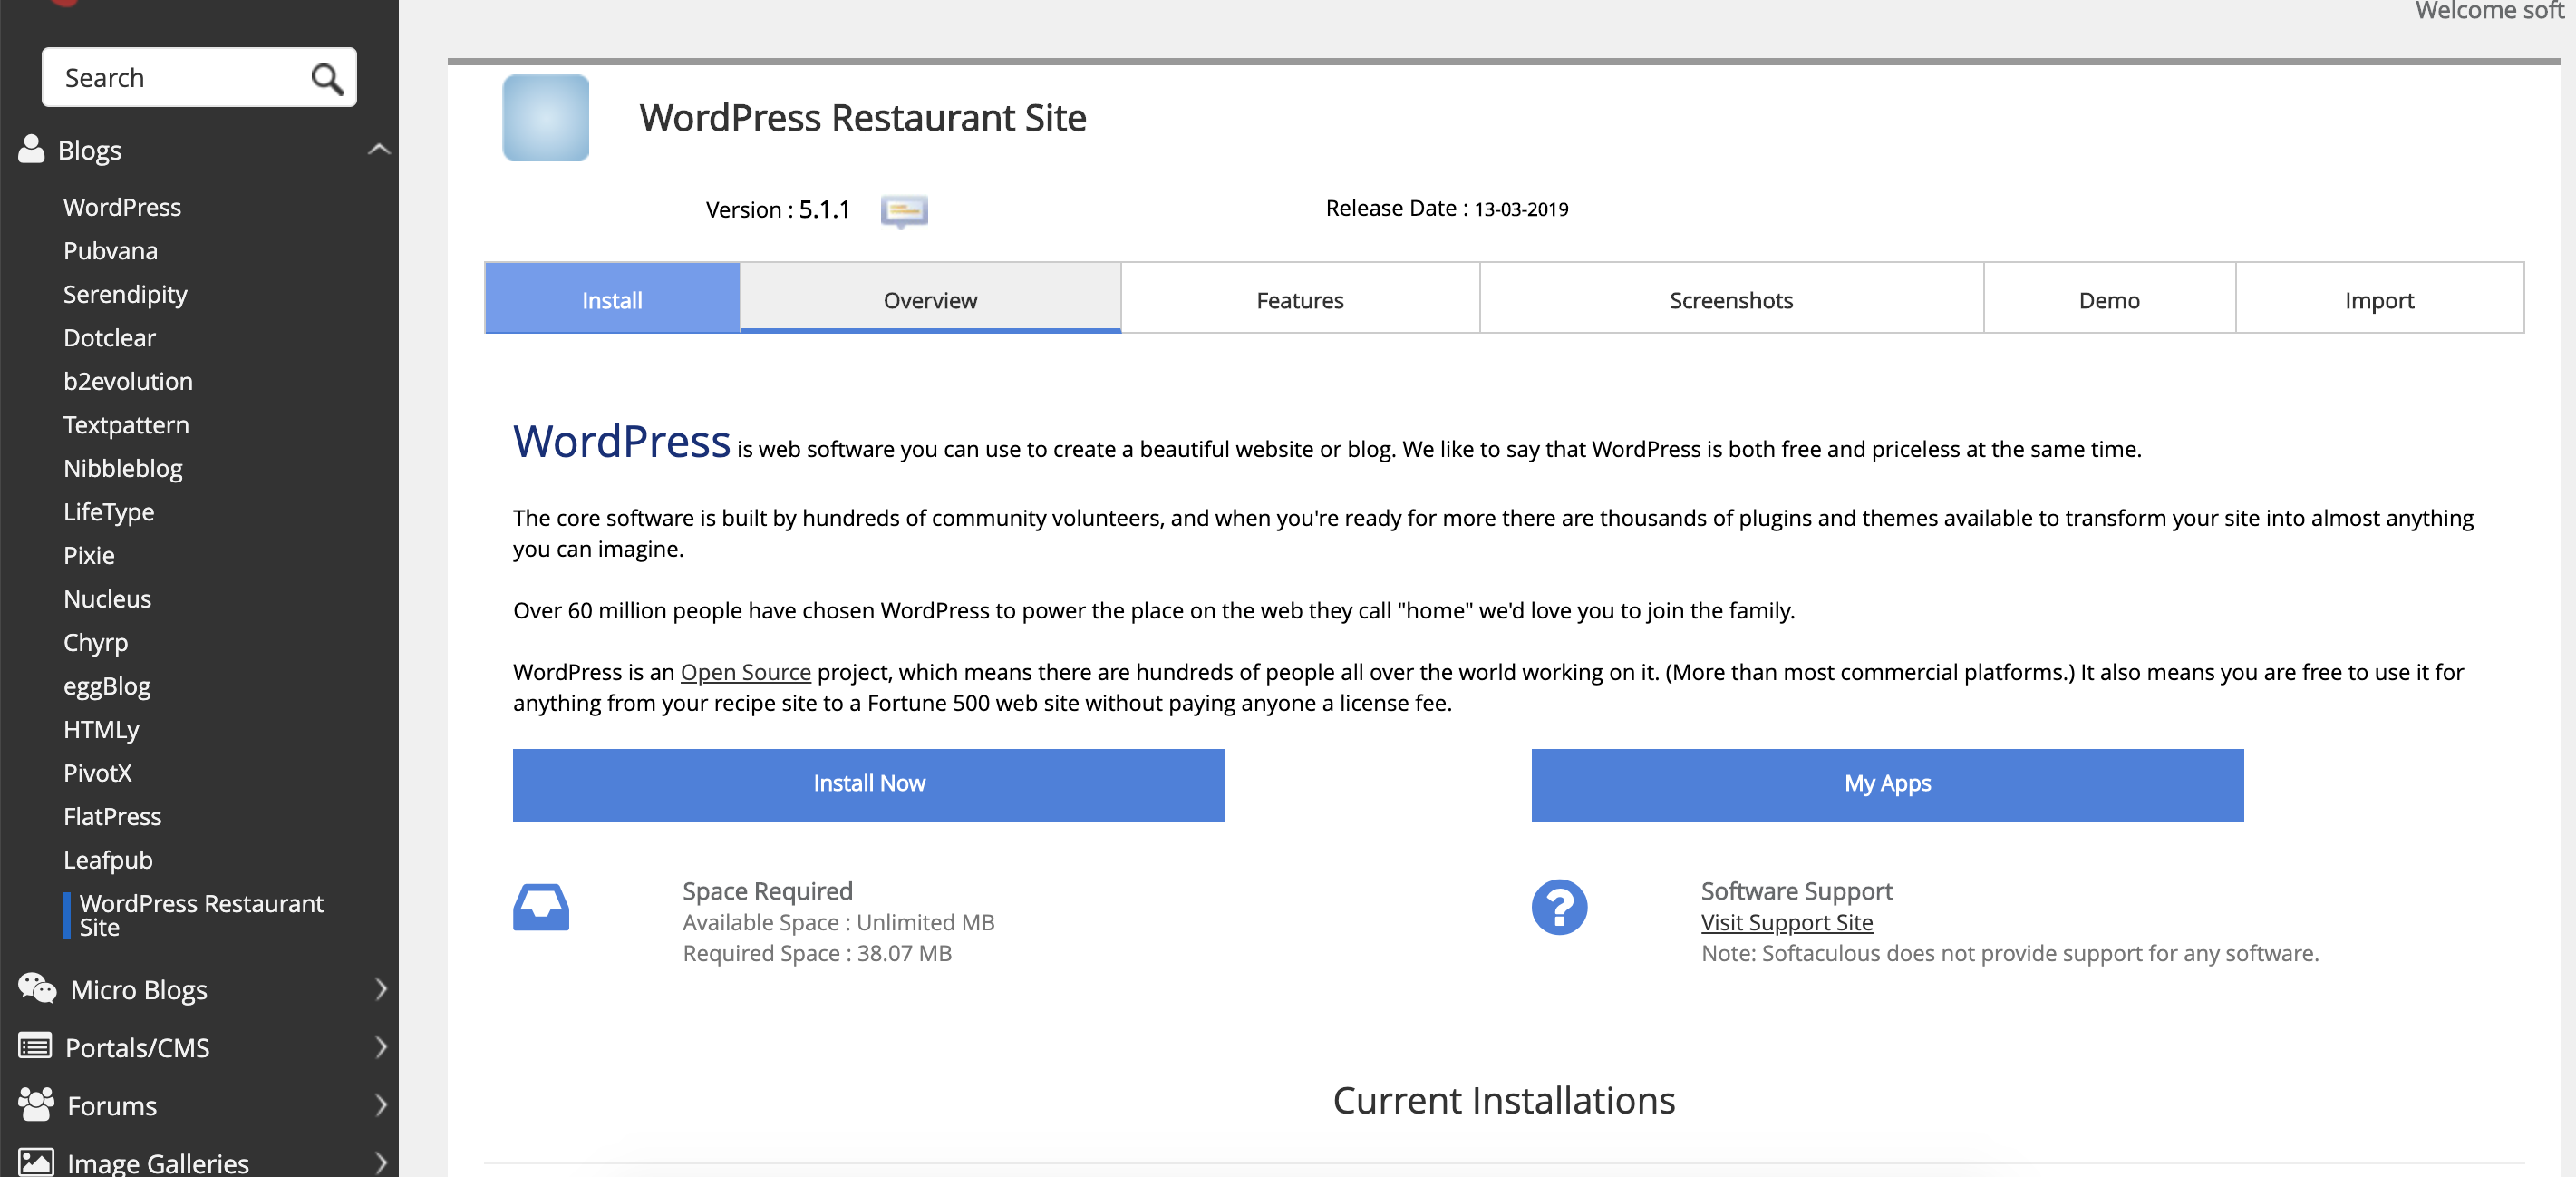
Now, if you go to your Softaculous dashboard, you’ll see that, under the “Blogs” category, there’s a new package option, like in this screenshot:
Your new custom WordPress package will now be available for your customers to install and set up.