

Blog
Introducing the Newly-Redesigned Etoile Web Design Website
Read Post →
Managing Customers and Sales Reps
In the final blog post in our Features series about the Order Tracking WordPress plugin, we’re going to look at how to help keep orders better organized by using the customers and sales reps features. We’ll start by looking at customers.
The customers feature was created so that users with many orders could view the status of their orders all at the same time, without having to remember individual order numbers. If the customer is associated with a particular WordPress user, they won’t need to fill in any information at all to view updates on their orders!
To create a new customer, head to the Customers tab of the plugin’s admin area. Click the Add New button at the top of the page to create your first customer, enter their name and email, and, if they have a WordPress user profile on your site, select the appropriate user to associate with this customer. Finally, press the Save Customer button.
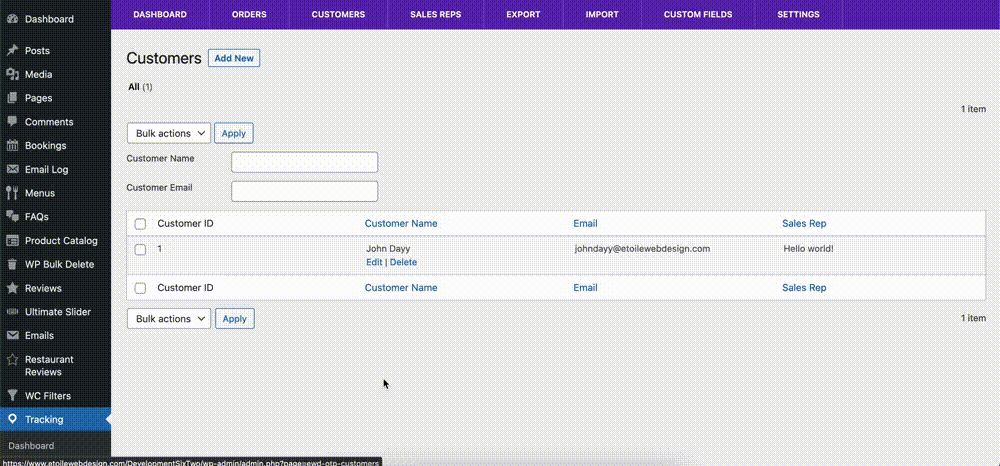
Next, head to the orders tab, and select an order that belongs to the customer that you just created. Select the customer that you just created using the dropdown box in the Order Details area to associate this order with that particular customer. Click the Update Order button to save your changes.
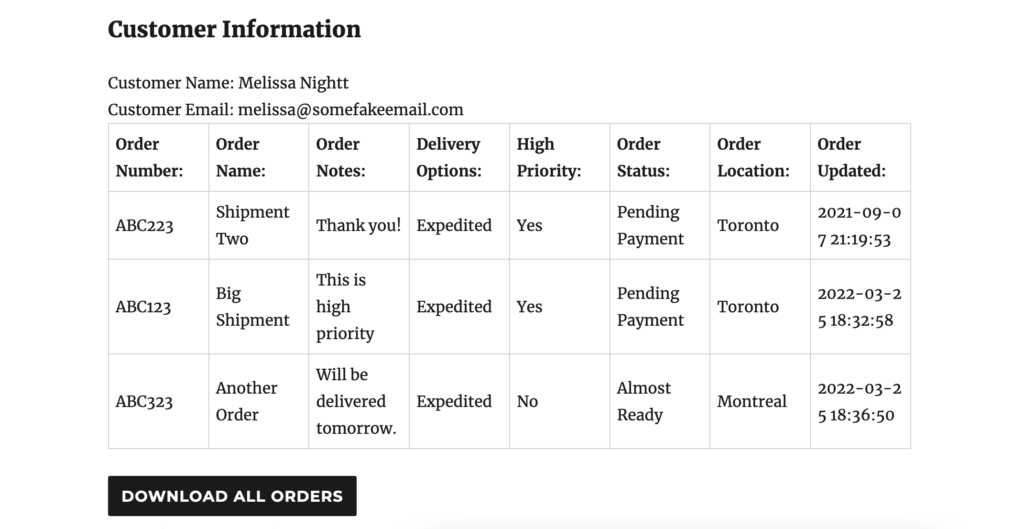
To let your customers view their orders, you’ll need to add the [customer-form] shortcode to a page on your site. Select the page where you want customers to check their orders, add the shortcode, and then save the page. When a customer goes to that page, they’ll automatically see their orders (if logged in to their user account), or be prompted to enter their customer number to view their orders. When they click on an individual order, they can see all of the details in exactly the same way as with the normal [tracking-form] shortcode.
Sales reps were created to serve a similar purpose: allow people in your organization to view and update orders assigned to them, without giving them access to orders managed by other employees.
You create a sales rep in the same way you do a customer. Go to the Sales Reps tab, add a new one and then fill in the details. After saving, head to the Orders tab, click on an order you want to assign to the sales rep, and then select that sales rep from the dropdown box in the Order Details area. If your sales rep has a WordPress user account associated with it, they’ll have their own Orders tab when they log in to your site now.
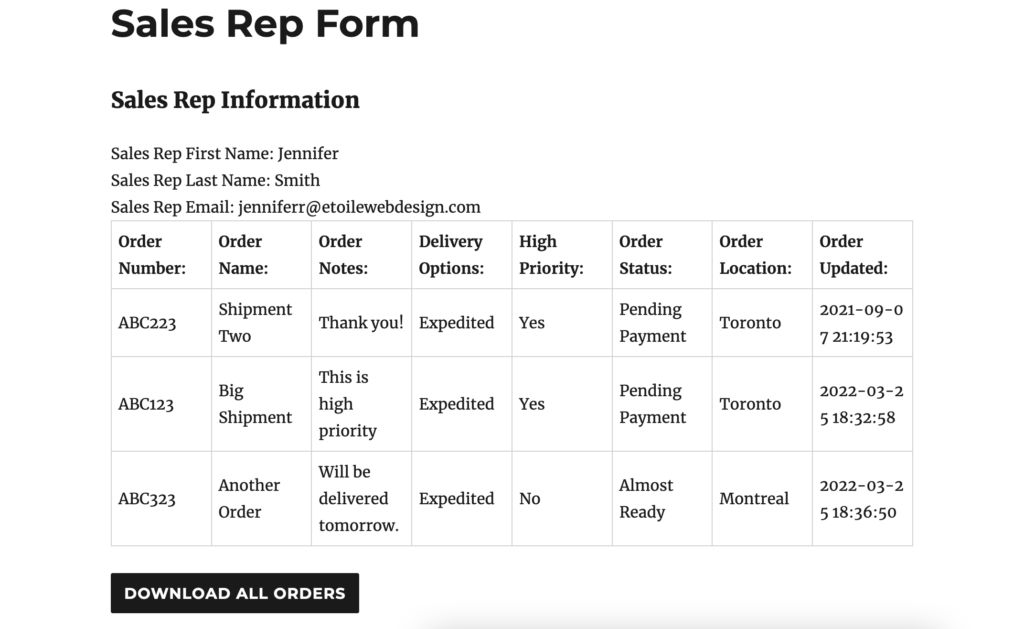
Finally, you can add the [sales-rep-form] shortcode to a page to let your sales reps view all of their orders in one place. They’ll be able to click on them to view their details, similar to the customer-form shortcode, and should be able to update their orders’ statuses when logged in as well!
If you have a premium license for the plugin, you can also add custom fields to customers and sales reps, so that any applicable data (internal customer number, purchase orders, sales agreements, etc.) can be displayed using the shortcode as well!
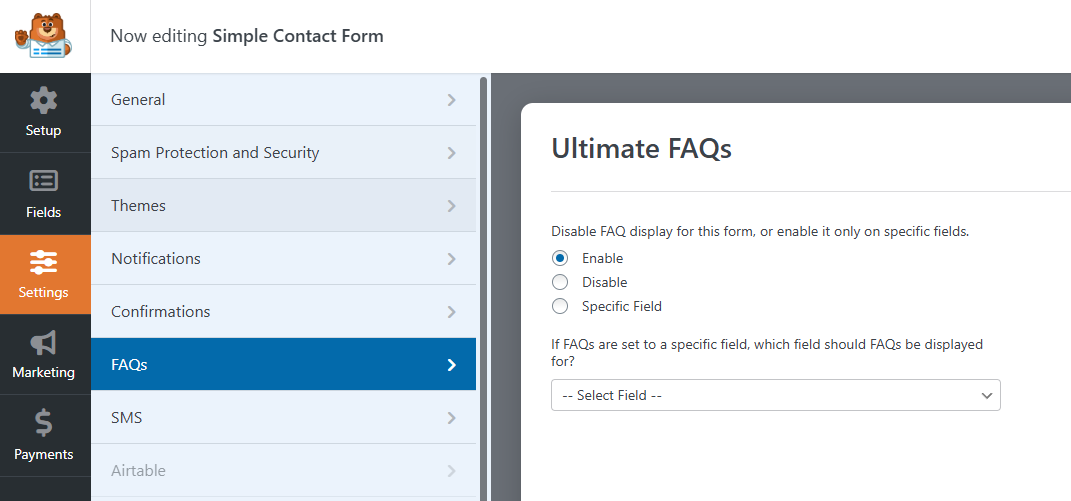
Next week, we’ll return to our WordPress FAQ plugin for the final three posts in our Features series, starting with adding an FAQs tab to the product details screen for WooCommerce products!


Discover all of our WordPress plugins
Browse Plugins