


We’ve put together this post to go along with our video tutorial series that shows you how to set up a restaurant site. Once you’ve added the content and followed the last video (which explains how to run your checks and debugging), you’ll want to look at styling your site. This post covers the steps we took to get our demo site looking more professional and polished.
You can view our demo site here: http://www.ewdyoutubetutorials.com/restaurant-site/
Logo
The first thing we did was add a new custom logo. If you’re making the site for an existing restaurant, it’s likely that you’ll already have branding and a logo in place (on your physical menus, for example). If it’s a new startup, you can work with a graphic designer to create a unique logo that captures the essence of your restaurant. Either way, you’ll want to display this logo prominently on your site.
After adding the logo, we needed to make small adjustments to the heading/logo area in our theme. We used CSS for this. WordPress provides a section in their theme Customizer called “Additional CSS” that you can use to add in your own custom CSS. We used this to specify the width of the logo on different size devices.
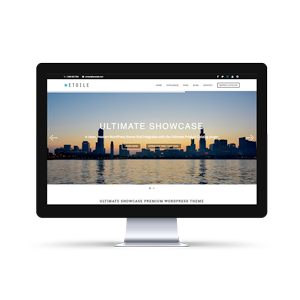
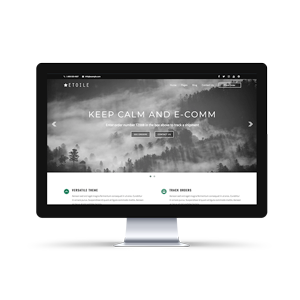
Homepage
After getting the logo in there, our next focus was the homepage, as that’s the first thing people see when they come to your site, and the page for which we needed to make the most changes.
The big image slider that shows at the top of the homepage is a feature that came with the theme that we used. It has its own settings panel (available in the WordPress Customizer), which we used to increase the amount of time each slide stayed on the screen. We then added our own CSS (using the Additional CSS section) to increase the height of the slider, to reduce the amount of space above the text on the slider, to add a transparent background to the text, to hide the “Continue Reading” button and to remove the curtain graphic that was showing under the slider.
We then added some extra CSS to adjust the spacing of the text in the “About Us” section, and then also to disable the link behavior of the headings in the “What’s Happening” section, which, because of the way the theme is set up, were linking to other pages.
We felt the layout of the “What’s Happening” section was a bit lacking, so we made small changes to the homepage template in the child theme files. We added a couple lines of HTML to make it so this area displays in two columns, with the title on the left side and the description on the right.
Inner Pages
Next, we moved on to the layout of the inner pages. The sidebar contained only elements related to blog posts, which we’re not using on this site, so we decided to remove it. We added some CSS to hide the sidebar, to make the width of the main area 100% and also to make the featured image take up the full width. After doing this, we found that the images were a little too tall, so we cropped the images to have a ratio of 3:1, and swapped one of the images that didn’t work with the new ratio for another.
Besides this, we also added some CSS to make the buttons on both the reservation form and the contact form match the styling of the rest of the site (flat and pink), and also to make the comment area on the contact page line up with the rest of the form. It’s important to note that the Additional CSS area can be used not only to modify the styling of theme elements, but also for elements from other plugins, like the WP Forms plugin, which we used on the reservation and contact pages.
Menu Page
With that in mind, we also added added in some CSS to change up the default layout of the menu. We made the images and text smaller, removed the borders, brought the price in line with the food item name and reduced the spacing between menu items.
FAQ Page
The Ultimate FAQs plugin that we are using to create our FAQ page comes with a lot of options that we made use of to bring the styling more in line with the overall feel of our site. In the Ultimate FAQ plugin options, we chose the Contemporary style layout, set it so that h3 headings would be used for the category titles and h4 headings for the questions, and then decreased the font size for each of those. We then used plugin options to hide the author of the post and the permalink, to move the posted date blow the answer, and to choose the color of the various FAQ elements.
There is also an option within the Ultimate FAQ plugin settings to input your own CSS to further modify the look and layout of your FAQs. We used this option to hide some extra paragraph tags that the theme was injecting into our FAQ posts, to add some spacing below the date and above the “+” icon, and also to adjust the color and font weight of the the date and categories.
Here’s the final “Additional CSS” code that we used.
body {

	color: #333333;

}
/*slider*/
.site-branding {
margin: 8px 0 16px;
}
@media screen and (min-width: 568px) {
.site-branding img {
width: 400px;
}
}
@media screen and (max-width: 567px) {
.site-branding img {
max-width: 80%;
}
}
.owl-carousel,
.owl-stage-outer,
.owl-stage,
.owl-carousel .owl-item,
.owl-carousel .owl-item li,
.owl-carousel .owl-item img {
height: 460px !important;
}
.banner .banner-text {
top: 6vw;
}
.banner .banner-text .text {
text-transform: none;
}
.banner .banner-text .text a.btn {
display: none;
}
.banner .banner-text .text p {
background: rgba(0,0,0,.4);
padding: 8px 13px;
}
body.home .banner:after {
background: none;
}
/*menu page*/
.erm_menu {
border-top: 3px solid black !important;
}
.erm_menu h1 {
display: none;
}
.erm_menu h2 {
font-size: 28px !important;
border: none !important;
}
.erm_menu h3 {
font-size: 20px !important;
}
.erm_menu img {
width: 90px !important;
}
.erm_product {
margin: 8px 0;
}
.erm_product_price {
float: right;
margin-top: 9px;
}
/*homepage*/
body.home #product p {
margin-top: 16px
}
body.home #events h3 a {
cursor: default;
pointer-events: none;
}
/*inner pages*/
#secondary {
display: none;
}
#primary {
width: 100%;
padding: 0;
}
.entry-content .wp-block-image {
width: calc(100% + 66px);
margin-left: -33px;
max-width: none;
}
.entry-content .wp-block-image img {
width: 100%;
}
/*faq page*/
.ufaq-faq-category-title h3 {
font-size: 24px !important;
}
.ufaq-faq-title p {
display: none;
}
.ewd-ufaq-author-date,
.ufaq-faq-categories {
color: #888;
}
.ewd-ufaq-date {
font-weight: normal;
}
.ufaq-faq-display-style-Contemporary .ewd-ufaq-post-margin-symbol {
margin-top: 10px;
}
/*reservations anc contact us pages*/
.rtb-booking-form button,
div.wpforms-container-full .wpforms-form button[type="submit"] {
background: #F6A8C6;
box-shadow: none;
text-shadow: none;
color: #fff;
border: 2px solid;
border-color: #F6A8C6;
font-size: 14px;
margin-left: 2px;
}
.rtb-booking-form button:hover,
div.wpforms-container-full .wpforms-form button[type="submit"]:hover {
background: #F3C4D6;
box-shadow: none;
text-shadow: none;
color: #fff;
border: 2px solid;
border-color: #F3C4D6;
font-size: 14px;
cursor: pointer;
}
div.wpforms-container-full .wpforms-form textarea {
max-width: 60%;
}