
Blog
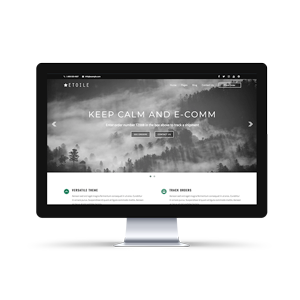
Introducing the Newly-Redesigned Etoile Web Design Website
Read Post →
WordPress FTP (File Transfer Protocol) Installation – Dreamhost
This is the video that accompanies the blog post:
Transcription:
We’re going to be covering how to manually install WordPress via FTP in this video, with Dreamhost as our hosting provider. If you haven’t already signed up for hosting and registered a domain, take a look at our video which covers deciding on a host.
There are a number of steps to this process. First off, we’re going to download WordPress as a zip file from WordPress.org. Once that’s done, extract the files to a “wordpress” folder on your desktop.
Next, we need FTP access for our website. We’re going to download FileZilla as our FTP client, because it’s relatively easy to work with. Once that’s installed, click on “File” -> “Site Manager” and press the “New Site” button. Make sure you set the dropdown to “SFTP”, and for Dreamhost, the host is just your website address. We’re going to need the login credentials to access our website via FTP, so let’s go find those.
In your Dreamhost panel, head to “Domains” -> “Manage Domains” and in the “Web Hosting” column, you should see your username underneath a description of how your site is being hosted. Next, head to “Users” -> “Manage Users” and click “Edit” next to that username. Set a new password in the “New Password” field, and enter it again in the “New Password Again” field. Return to FileZilla, and enter the username and password into the appropriate fields. Finally, set the port to “22” and then hit the “Connect” button. If everything has been entered correctly, you should now be connected to your site via FTP.
Next up, we’re going to upload all of the WordPress files we downloaded and extracted into our “wordpress” folder. Double-click on your domain name in the bottom right-hand panel. In the bottom left-hand panel, navigate to that “wordpress” folder on your desktop. Select all of the files in the folder, and drag them over to the right-hand side. You’re now uploading all of the necessary WordPress files to your website.
While those files are uploading, we’re going to create the MySQL database that’s needed to run WordPress. Head back to your Dreamhost panel, and head to “Advanced” -> “MySQL Databases”. Enter “wp_database” as your database name, leave the “Use hostname” dropdown set to “mysql.yourdomain”, and then set “First User” to “Create a new user now…”. Set a username and password for your database user, and remember them for the final step in our WordPress installation process.
Once all of the files have finished uploading in FileZilla, head to your domain in a web browser. You should be prompted to enter your database details. You should have the “Database Name”, “Username” and “Password” from the previous step. For the “Database Host” field, enter in “mysql.yourdomain”. We’ll also leave the “Table Prefix” field set to “wp_”. Click “Submit”, and you should be taken to the final “Welcome” screen.
Set your site title, don’t worry, you can always change it later. Next, create a username and password, preferably something that’s hard to guess for both fields, so not “admin” or “username” for the “username” field, and not “password” for the password field. WordPress will estimate the strength of your password, and you can always click on the “Use Weak Password” checkbox if you really want to enter a specific password. Enter your email address, leave the “Search Engine Visibility” checkbox unchecked, then click “Install WordPress” and you should be done with installation!
Next up, we’re going to cover setting up the users for your WordPress site.


Discover all of our WordPress plugins
Browse Plugins