Blog
Introducing the Newly-Redesigned Etoile Web Design Website
Read Post →
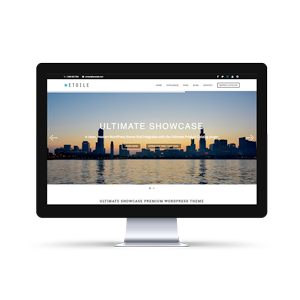
Build a WordPress E-Commerce Website – Choosing a Theme
This is the blog post that accompanies the following video:
Transcription:
This video is going to cover how to choose a theme for your website, before moving on to adding a free theme to the site we’ve been building so far, and once we’ve done that, we’ll set up our homepage. You should have a website set up with basic content at this point, and if you don’t, check out the earlier videos in this tutorial series.
There are plenty of websites out there with lists like the 10 best themes for a restaurant or 15 great themes for your small business. In this video, we’re going to cover how you should evaluate themes, rather than just listing a few good ones.
There are 3 main things to look at before deciding on a theme: first, does the theme have the features and look that you want for your website, second, is it responsive, meaning does it look good at all different screen sizes and work well on mobile, and finally, how much does it cost.
The best way to start is usually to list the features you want out of a theme. For example, maybe you want a theme that integrates well with a particular plugin, or is designed specifically for your industry. Once you’ve decided on the main features that you really need, you can rule out a lot of themes that don’t provide that core set of features.
Next, you can check if a theme is responsive by opening up the theme demo on your phone, and resizing your browser window while visiting the demo site. If the content overlaps at certain sizes, pictures become too small or text becomes difficult to read, it’s probably worth moving on to another theme candidate.
Last, if you’ve got a few possible themes that meet all of your criteria and are responsive, you can judge them based on their price as well as their features. Paid themes generally have better developer support and are less likely to be abandoned, but for certain types of sites, there are also some great free options that exist.
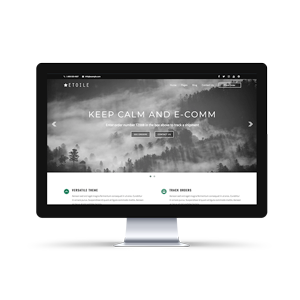
For our e-commerce website, we’re going to use the free version of the Keep Calm and E-Comm theme available on WordPress.org, although you should definitely check to see if there’s a theme that is a better fit for your site. Keep Calm and E-Comm is WooCommerce compatible, which is great if you’re planning on selling items through your site, it loads quickly, is translatable, and has interesting homepage sections such as testimonials and featured products that we’ll set up later in the video.
To install Keep Calm and E-Comm, log in to your WordPress site as the administrator. Next, go to “Appearance” -> “Themes” and click on the “Add New” button. In the “Search themes” box, type in “Keep Calm and E-Comm”, hover over the theme and then click the “Install” button. Installing should take a couple of seconds, and once it’s done, click on the “Activate” button. That’s it, you’ve installed and switched to a new theme!
We’re also going to add in the suggested helper plugin for the theme. Go to “Plugins” -> “Add New”, and then search for “Etoile Theme Companion”. Click on the “Install” button, and once it’s installed, activate the plugin.
The first thing we’re going to do is set up our menu bar. To do that, head to “Appearance” -> “Menus”. We’ll call our menu “Main Menu”, and click “Save Changes”. Next, select the pages we created in the last video from the “Pages” box on the left-hand side of the page. Once you’ve selected them all, click on “Add to Menu”. You can drag and drop the pages into any order you’d like in the menu, and then press the “Save Menu” button. Click on “Manage Locations”, and select the menu we just created in the dropdown for the “Main” menu for the theme. Click “Save Changes”, and you should be all done with setting up the main menu for your site.
Once that’s done, let’s move on to customizing the theme’s color scheme. To make changes to the theme, head to “Appearance” -> “Customize”, which should bring up the WordPress customizer. Take a few minutes to set the colors up to match the style of your restaurant’s promotional material. In this video, we’ll change the background color of our website to light grey, make the text color a bit darker, and set a logo for our site. Head to “Colors” to open up a color picker. We’ll set our background to #dddddd, but you can use the color picker to get whatever color is right for you. Next, set the text color to #333333. Once that’s done, click the back arrow and select “Site Identity” from the menu. Click the “Select Logo” button, upload an image file with your shop’s logo, crop it to your desired dimensions, and then select it.
As a final step in our theme tutorial, we’re going to set up our homepage. Click the back arrow and then select “Home Page General”. We’re going to set up “Testimonials” and “Featured Products” sections. You can include any of the other features in your homepage, just work at it a bit until you find a look that’s right for you. Make sure you’ve got the “Display Testimonials” and “Featured Products” radio buttons selected, and then click the “Save and Publish” button at the top of the customizer menu. Exit the customizer by clicking on the “X” at the top of the page.
For our testimonials, head to the “Theme Options” -> “Testimonials” section. We’ll create two clearly fake testimonials for the time being, but you should look for or solicit a few real ones from your customers. Testimonials have been shown to be one of the most effective tools to get people to believe your site it authentic. We’ll call our first testimonial “Fake Testimonial One”, and in the body write “This is a fake testimonial.”. You can also add a name and company to be associated with the testimonial in the section below, or edit the testimonials’ order in the right-hand column. Click “Publish”, and then hit the “Add New” button create our second one. We’ll call this one “Fake Testimonial Two”, and write “This is also a fake testimonial” in the body of it. Add a name and company again, and hit “Publish”. You should now see your fake testimonials appear on the page if you browse to your homepage!
Next, head to “Theme Options” -> “Featured Products”. We want to dd featured products on this page, but it looks like none currently exist, so we’ll have to wait until we create products in the next video before they can be added to our homepage. There’s a tonne more that can be done to really get your theme customized for your organization. Check out our blog post on setting up your theme for this tutorial series to see additional changes we made to the demo site we’ve got set up. In the next video, we’ll cover selecting and adding plugins to your website, so that we can add in products that can be featured on the homepage, as well as fill in some of the other pages that we’ve left blank on our site up to now.


Discover all of our WordPress plugins
Browse Plugins