
Blog
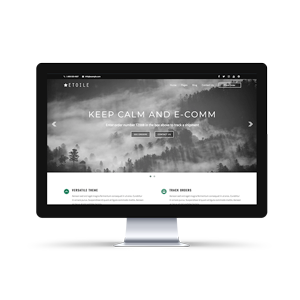
Introducing the Newly-Redesigned Etoile Web Design Website
Read Post →
Choosing a Hosting Company, Sign Up and Registering a Domain
This is the blogpost that accompanies the following video:
Important links:
Bluehost Sign-Up
Hostgator Sign-Up
Dreamhost Sign-Up
Dreamhost $50 Off Shared Hosting
Bluehost Knowledge base
Dreamhost Knowledge base
Sign up and registration walk-throughs:
Bluehost
Hostgator
Dreamhost
Transcription:
Welcome to our tutorial series on setting up a WordPress website! In this video, we’re going to cover the first step to building any website: selecting a hosting company and registering a domain. There are a few criteria that many people use to judge a hosting company, things like the company’s reputation, the cost of registering and hosting a site, the quality of the support and FAQs offered by the host and finally, since we’re setting up a WordPress website, whether the host offers some kind of simplified WordPress installation.
It’s definitely worth doing a few minutes of research into hosting companies before you get started, and there are a tonne of hosting companies out there, but we’re going to look at 3 of the most popular ones in this video. We’re going to look at Bluehost, HostGator, and Dreamhost. All three are linked to in the video description, if you decide to go with 1 of the 3 we cover.
First up is Bluehost; of the 3, they have the best uptime in the past year at 99.99%, best average load time at 419 ms, host over 2 million websites, and have highly rated support. They’ve also got a pretty decent knowledge base to help you sort out any problems you might run into, which is linked to below, and they seem to have a 1-click WordPress install option, although it’s not something I’ve personally tested.
Next is HostGator. They host over 10 million sites, making them one of the biggest hosting companies, and their cloud hosting had 99.97% uptime over the past year with an average load time of 421ms. Their cloud hosting option has a regular price of $13.99 per month, making it a bit pricier than standard shared hosting, and in my past experiences with their support desk, the knowledge-ability of their support staff left a bit to be desired.
The last hosting company we’re going to look at is Dreamhost. Their up-time for the past year was 99.94%, with an average load time of 724ms. Dreamhost’s shared hosting starts at $2.59 per month, comes with unlimited bandwidth, and a great WordPress one-click installer which we’re going to be using in one of our WordPress installation tutorial video. I’ve had pretty good experiences with their support team anytime I’ve had an issue with their hosting service, so they’re the hosting we’re going to be using for the rest of this tutorial series. If you decide to go with them, we’ve got a $50 off code in the video description that you can use to get started.
Whichever hosting you decide to go with, the next few steps will be pretty similar, and we’ve posted links to instructions for sign up and domain registration for all three hosts below. Head over to Dreamhost.com and click on the “Get started button” to begin the sign up process. First off, select the type of hosting that you want. I’m going to be signing up for their “Shared Unlimited” hosting so that I’ve got access to their email features, but you can choose whichever service is right for you.
Start by entering your email address into the email address field, and once you’ve done that create a password in the field below. Click on the continue button, which takes us to the choose domain screen. We’re going to enter a domain that we’re interested in, and then once you’ve done that, click on the search icon to the right. If everything goes well, you should be able to click on the register button below. I’m going to be choosing the one-year hosting, and unselecting the site monitoring. Click on the continue button and fill in the form with the credit card information we’re going to be using to pay for the site. Once you’ve done that, click the pay button at the bottom of the page and you should be taken to your new Dreamhost panel.
Once you’ve done that, the next step will be to actually install WordPress on your new domain!


Discover all of our WordPress plugins
Browse Plugins